Site Upgrades: Better Blogging!

I really have to say, I am absolutely impressed. Long have I been wanting some CMS to save me the hassle of building everything from scratch, but it always seemed that I’d try out something either beyond overbuilt, full of things I didn’t need and more importantly didn’t want.

WordPress seems to be the de-facto standard in this game, and for what it is, it is pretty good. But is isn’t for me.

WriteFreely seems quite different… we’ll see how things go!

Firefox is Crashing X.Org on my Thinkpad T400… Why?

X.Org

Only had the issue on my T400, but it was an issue under FreeBSD 13.4 /w the FireFox/FireFox ESR available from pkg… and the same darn thing is happening with Debian Bookworm. I’m wondering if the ancient Core 2 Duo is playing a role here… (tries to do X unsupported thing… & crash. ?)

Mostly when doing a search on google… and you click a link and BAM, back to the tty. (or login greeter screen)

Not the browser crashing either, when this happens it kills the whole X server. So not cool! Luckily I didn’t loose any work when this happened, and it has happened about half a dozen times or more. Saving frequently saves the day. I thought I was getting somewhere when I saw a post about trying to disable the HW acceleration option in FF preferences, and I did try. Unfortunately though, no luck.

Something did seem to work though, using the latest FF package from Mozilla. Here is an excellent, easy to follow cut & paste to get you the latest Firefox on Debian: https://support.mozilla.org/en-US/kb/install-firefox-linux

That got me to v 134, and the problem appears to be gone.

UPDATE: THE PROBLEM STILL HAPPENS on v 134 Sorry.

My Thoughts on OpenBSD

Puffy
A completely FREE, multi-platform 4.4BSD-based UNIX-like operating system with a strong focus on proactive security and integrated cryptography.


First of all, I’m going to disclose that
I haven’t really used OpenBSD extensively for my daily computing. While I’ve installed it several times, I always ended up choosing something else in the end. I was particularly interested in trying it out on my web server and even thought about using it on my ThinkPad. The installations went smoothly, and the hardware was well-supported. These are my thoughts on OpenBSD, why I’m not using it right now and why I may use it in the future.

    Setting up OpenBSD with a graphical X11 desktop, FVWM window manager, and xenocara display manager is surprisingly easy, even for someone without any previous experience. It’s straightforward to get started, and the default security measures can be a definite plus. However, to use it effectively without these features becoming a hindrance, you need to understand the relationship between OpenBSD and their vision of a secure Unix sytem.

    When it comes to partitioning, OpenBSD’s approach to partitioning is definitely not much like your typical modern Linux distribution. If you’re used to the very simple, one size fits all with just a big root (/) and maybe a couple GB for swap, this may seem foreign. Each partition should be sized carefully.  They’ll have their own unique locked down permissions, which can enhance security. For example, an X11 installation typically remains stable in size, including a little wiggle room for updates. While all Unix-like systems use permissions, OpenBSD takes it to another level. This can be great for security but requires some learning to manage effectively.  This table from their manual page does a much better job as a visual representation than anything I could put into words.


“The exact set of partitions created depends on available free space, how fragmented the free space is and some machine dependent variables, but will be approximately (as follows)”

> 10GB Free > 2.5GB > 700MB < 700MB
/ 150MB –   1GB 800MB –   2GB 700MB –   4GB 1MB – 2GB
swap  80MB – 256MB  80MB – 256MB   1MB – 256MB
/usr 1.5GB –  30GB 1.5GB –  30GB
/home   1GB – 300GB 256MB –   2GB
/tmp 120MB –   4GB
/var  80MB –   4GB
/usr/X11R6 384MB –   1GB
/usr/local   1GB –  20GB
/usr/src   2GB –   5GB
/usr/obj   5GB –   6GB

Source: Disk Allocation, The OpenBSD Man Page
Server [
link
]


    This will be a common theme on OpenBSD. Security. You’ll definitely see that given the option, most things will take the back seat to security if the choice arises. This isn’t a bad idea, but I can see how some people get the idea you’d have to be at least a little paranoid to want an OS as locked down and granular as this one. Or Maybe I’m just a s*** sysadmin?? Never the less…

Personally, my main gripe is that I can be quite particular about certain things. I prefer not to set half a dozen just shy of a dozen static partition sizes that can’t be easily adjusted later without redoing others. I don’t want to spend hours researching and comparing just to get everything perfect! You can opt for auto-partitioning, which I recommend, but depending on your disk size, adding extra packages can be hit or miss. I did an install on a 16 GB SSD recently and found that I was quickly completely out of room after installing an additional desktop environment and web browser. I’ve used the same tiny SSD without incident on Debian and FreeBSD with many more applications installed, so it is down to the partitioning. I can’t really fault OpenBSD for this, because I’m the lazy hack that wanted auto-partitioning, but my point is some things just don’t need to be so complicated.

Installing software is straightforward, although OpenBSD has its own rules. For instance, if I recall correctly, only members of staff can allocate more than 1024 MB of memory to their processes. This detail is crucial for tasks like running a database server or even just using Firefox with multiple tabs. This is very easily changed by simply editing a config file, but it is something to be aware of.

As for customization, OpenBSD is a lean and clean OS that offers a high degree of fine-grained control for those willing to invest time in learning it. However, for my needs, FreeBSD and Linux seem to have fewer complexities, and I find it hard to justify the time required to master OpenBSD. For something like a server I could see the initial time investment paying off in return for a long and secure service life.

Some of OpenBSDs features wont appeal to everyone. For instance, hyper-threading is disabled by default to enhance security against CPU exploits related to side-channel attacks. While this is a prudent security measure, it may impact performance. OpenBSD, despite being lightweight, might be less performant than FreeBSD or Linux in similar scenarios. Nevertheless, if OpenBSD’s security model aligns with your needs, performance considerations may become less critical.

    Overall, I think OpenBSD is fantastic. However, it’s not my go-to choice for my main machine. I have considered using it for a web server where maximum performance isn’t critical, as my server typically only deals with a load at a fraction of its capacity. OpenBSD is undeniably a robust and secure Unix-like operating system, with excellent documentation and from what I’ve heard some very clean code. To those interested; I’d definitely recommend that you check it out. Ironically, in light of any complaints I have stated above it really is probably the easiest BSD system to get up and running with a full graphical desktop.


Read more about:    Operating Systems    Software

XScreenSaver Install Script for Debian MATE Desktop

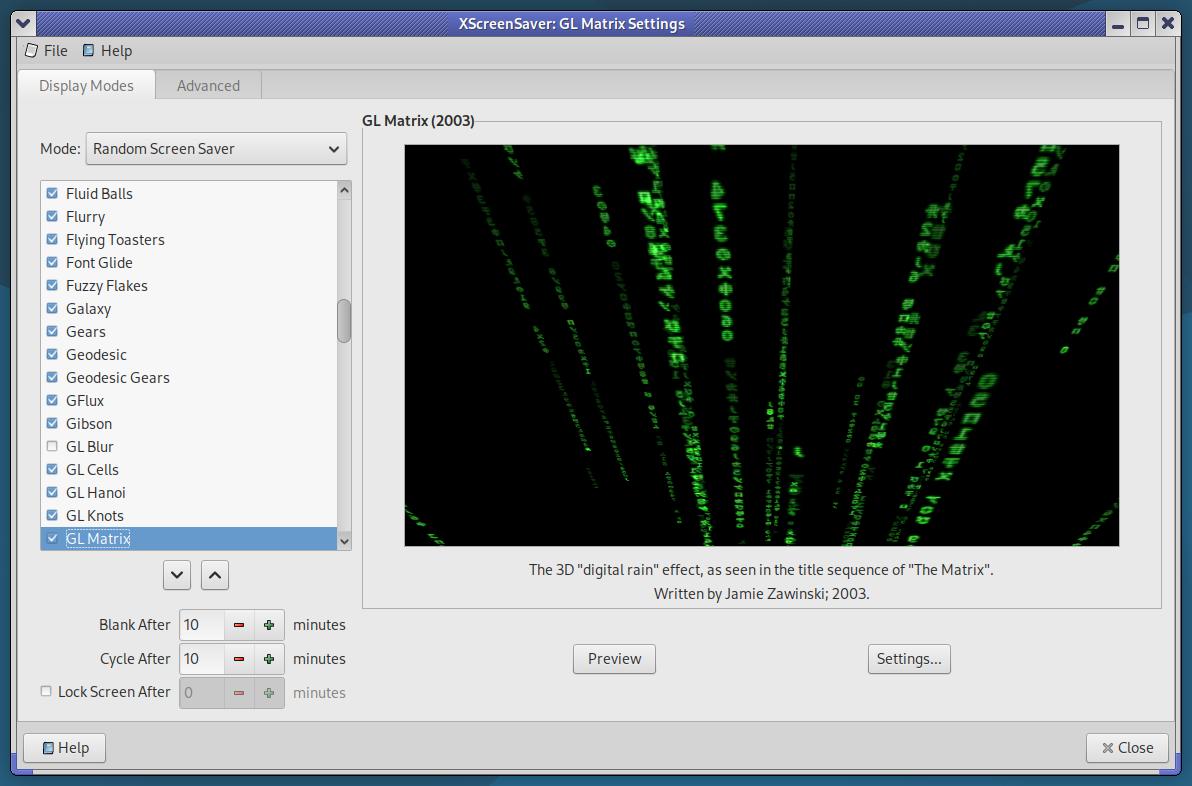
XScreenSaver

MAKING IT BE (a little) LESS PAIN IN THE ASS

If you’re using Gnome/MATE screensaver (or locker), I’d recommend you don’t. Weather it is because you value X locking security, or just admit it they’re cool screensavers, toss that in the bin and install the real deal.. XScreenSaver.

I have written a script which takes care of all of the following:
1. On Debian, XScreenSaver needs you to manually specify 4 packages to get the program, “extra” savers, gl savers, and “gl extra” savers. This will get you the complete collection, as the author distributes it.
2. Remove MATE Screensaver
3. Apt pin / pref so MATE Screensaver isn’t reinstalled next time you run apt, because MATE Desktop thinks it needs it
4. Autostarts XScreenSaver
5. makes a soft link so you can still lock from the “System” menu up top, and click “Lock Screen”. Now XS will do it.

This will save me HOURS over time.

Get it here: http://lostgeek.net/files/xscreensaver-mate.sh

The PiFrame — Pi Zero 2 LCD Weather Clock


The
          PiFrame

   Raspberry Pi Zero 2 WH — $18
I2C 20×4 LCD Display — $5
Shadowbox Frame — $7

Doing a geeky project for under $30?? Priceless…

Ah, the Raspberry Pi. That $35 single board computer everyone was scalping for 3x what they were worth during the chip shortages. Well, I used to own several of them… and unfortunately no longer do. I will say, for the MSRP price they aren’t a bad option. The whole ecosystem is quite attractive for many reasons, and the brand receives praise left and right for it. I will indeed say, they’re basically swiss army knives for a hacker. A whole miniature linux system, with a quad core 64 bit CPU and often 1 – 4 GB of RAM. IMO the 8 GB is a waste of money, of course, I tend to like lean configurations so perhaps I just feel that way because I’d never use 4 GB on a Pi let alone 8. AND, if I did need 8 GB or more, I’d use a DDR4 mini PC, not a Pi!

Anywho, in the spirit of what the Pi is all about, I wanted something cheap to hack on. I have a Pi 5, but it pulls full time duty as a server. And, what can I say? It works so well for this, and the small size and lower power requirements are part of that attraction for me. Now, PCIe gigabit ethernet, and PCIe NVME storage are a pretty strong motivation for my willingness to keep the Pi 5 4 GB I’ve got employed as a server. Without those, I’d use a thin client or old laptop in a heartbeat. Oh yeah, the spirit of the Pi, that’s where I started blabbing right?

So the Pi Zero, it’s like an original 2012 Pi, but with optional Wifi. You loose onboard ethernet (but it was USB anyway on the early models, and you do have a USB port to add a NIC…) but you get a very small package still boasting full 40 pin GPIO. They refreshed the Pi Zero in late 2021 with the Pi Zero 2. If you want WiFi and BT, you want the Zero 2 W. Want pre-soldered GPIO pins too? Get the WH.

** NOW a little PSA here, I bought a Pi Zero 2 WH on Amazon… so that came /w a soldered GPIO pin header. Quite handy, even has color coded spots at the base of each pin so you know what is GPIO, 5v, Ground, etc… Except, mine was put on upside down. Took me forever to figure this out, and I would have been pretty pissed if I needed to RMA it because some shoddy reseller is doing these headders themselves to save 30 cents and mislabeling the pins. I don’t care now that I know, but being largely for the education market this is a bit discouraging to see. If I were in the same situation as a young kid, the Pi may very well have gone in the bin.

You can get a pack of two 20 character / column x 4 row LCD screens, with pre-soldered i2c “backpack” for about ten bucks. And, you can get it in green, red, blue, whatever you want. I went with the OG, green LCD.

Let there
        be light!

So… what does it do? Well, it’s an excuse to have another Linux box in your fleet, I mean, what more do you want?? But since you asked, it does anything you tell it to. Right now, mine spends five seconds showing me the date, time, and my web server uptime. Then it shows me local weather for another five seconds. There’s more in the pipe though, and trying out new code is incredibly easy.

LCD
        Display LCD Display

What makes this clock… tick?? Python.

#!/usr/bin/env python

import drivers
from time import sleep, strftime
import argparse
import requests
import subprocess

def get_uptime():
    try:
        # Run the 'uptime -p' command and capture the output
        #result = subprocess.run(['uptime', '-p'], capture_output=True, text=True, check=True)
        result = subprocess.run(['cat', '/tmp/uptime'], capture_output=True, text=True, check=True)
        uptime_str = result.stdout.strip()  # E.g., "up 1 day, 1 hour, 45 minutes"
        
##        # Use awk to format it as "up 1d 1h 45m"
##        formatted_uptime = subprocess.run(
##           ['awk', '{print "WWW up ", $2 " weeks", $4 "d", $6 "h"}'], input=uptime_str, text=True, capture_output=True
##        ).stdout.strip()

## The above works, when you've had < 7 days up... then we need the following... (and yes, I could have made this MUCH more elegant)

        # Use awk to format and convert weeks into days, then calculate total days
        formatted_uptime = subprocess.run(
            ['awk', '{week_days=($2*7); total_days=week_days+$4; print "HTTPD.lan up", total_days "d", $6 "h"}'], 
            input=uptime_str, text=True, capture_output=True
        ).stdout.strip()
        return formatted_uptime

    except subprocess.CalledProcessError as e:
        print(f"Error getting uptime: {e}")
        return "Uptime not available"

# Load the driver
lcd = drivers.Lcd()

# Weather API settings
API_KEY = "000000000000000000000" ## The API keys are free, just sign up. Painless or I wouldn't have bothered.
ZIP_CODE = "00000" ## Your Zip code here!
COUNTRY_CODE = "US"
WEATHER_URL = f"http://api.openweathermap.org/data/2.5/weather?zip={ZIP_CODE},{COUNTRY_CODE}&appid={API_KEY}&units=imperial"

# Function to fetch weather data
def get_weather():
    try:
        response = requests.get(WEATHER_URL)
        data = response.json()
        if data and data["cod"] == 200:
            temp = round(data["main"]["temp"])
            humidity = data["main"]["humidity"]
            wind_speed = round(data["wind"]["speed"])
            wind_dir = data["wind"].get("deg", "N/A")
            return temp, humidity, wind_speed, wind_dir
    except Exception as e:
        print("Error fetching weather:", e)
    return None, None, None, None

# Parse command-line arguments
parser = argparse.ArgumentParser(description="LCD Display Script")
parser.add_argument("--wc", action="store_true", help="Only display weather and clock pages in rotation")
args = parser.parse_args()

try:
    while True:
        # Date/Time page
        lcd.lcd_clear()
        lcd.lcd_display_string(strftime("Today is %A,"), 1)
        lcd.lcd_display_string(strftime("     %B %d"), 2)

        # Display uptime on the 4th row
        uptime = get_uptime()  # Call the function and store the uptime
        lcd.lcd_display_string(f"{uptime}", 4)

        # Continuously update the time (third row)
        for _ in range(10):  # Display for ~10 seconds
            lcd.lcd_display_string(strftime("     %I:%M:%S %p"), 3)
            sleep(1)

        # Weather page
        if args.wc:  # Include weather in both modes (if --wc is passed)
            temp, humidity, wind_speed, wind_dir = get_weather()
            if temp is not None:
                lcd.lcd_clear()
                lcd.lcd_display_string("    Boscawen, NH    ", 1)
                lcd.lcd_display_string(f"    Temp: {temp}F   ", 2)
                lcd.lcd_display_string(f"   {humidity}% Humidity", 3)
                lcd.lcd_display_string(f"  Wind: {wind_speed}mph", 4)
                sleep(5)

except KeyboardInterrupt:
    print(" ~ Clearing ~ ")
    lcd.lcd_clear()

Now, I’m not really much of a programmer. Nope. But, ugly or not there it is. I suggest you do what I did, and start here: The Raspberry Pi Guy has a page with sample code and some other helpful stuff on Github. Using the 16×2 code on a 20×4 is as easy as changing 16 to 20 and 2 to 4. Well, gotta add lines 3 and 4 below 1 and 2. But not rocket surgery.

I recommend using the overlay FS and read only /boot partition if you do something like this to avoid accidental SD card filesystem corruption from unsafe shutdowns. I actually added a systemd service so that on target of reboot, halt or shutdown a shell script will kill the python process, then launch another which blanks the screen and replaces the text with “IT IS NOW SAFE TO TURN OFF YOUR COMPUTER” — if you know, you know. About 1 second after that hits the LCD, the Pi powers off and the Act LED goes dark. The LCD will stay lit, and retain the last thing printed on it as long as power is connected.

Now, the BEST thing to do for your filesystem / SD card is to power off via SSH before unplugging any Pi. However, to power my “clock” up, all I do is plug it in. If you put in your crontab a line starting with @reboot, you’ll be able to easily start scripts at boot. I did this as root, because I think you need to be root to use the GPIO. Probably a way around this, but this runs nothing other than the display stuff at the moment.

Cron on the Pi Zero 2 W. aka PiFrame:
@reboot /root/lcd/bens3.py –wc
@reboot curl -s https://ben.lostgeek.net/uptime.txt -o /tmp/uptime
0 * * * * curl -s https://ben.lostgeek.net/uptime.txt -o /tmp/uptime

What this does is at boot, we pull uptime from a text file on my webserver and we start up the python program with the –wc arg, “weather clock”. This applies to the code above, so I left it as is. Only one more part is needed.

Cron on the server:
0 * * * * uptime -p > /var/www/html/ben/uptime.txt

This puts an up to date uptime file in my web directory once an hour. And the keen observers among us probably noticed that the Zero also will refresh this information at the top of each hour too. Easy peasy.

Raspberry Pi 5 PCIe Gen 3 Follow-Up

Good News,

Perhaps you’ve read my last article related to the Raspberry Pi 5, where I explore what kind of NVMe SSD experience one can get for a mere $25 or less spent on Amazon. And, the TLDR is that for under $25 I was able to purchase a brand new PCI-E M.2 HAT for the Pi 5, as well as a name brand Gen 3 128 GB SSD. The SK Hynix SSD was not brand new, it was pulled from something but SMART showed that it had less than 300GB written to it, so IMO absolutely worth buying.

So in that write up, I discuss the PCI link speed situation… basically, the Pi is only certified for Gen 2… but Gen 3 offers nearly double the speed! Immediately, I was conflicted. Even at Gen 2 speed, this already beats using SD card storage by a MILE. Way more reliable, MUCH faster, and much larger. There is no down side, other than costing a small bit more. Since this runs my server, I could have happily stuck with Gen 2 and still gotten more than my money’s worth in terms of bang-for-buck computing goodness out of the upgrade. However, many folks on the net reported no issues whatsoever running at 3.0 link speed, so I figured I’d try it, run several benchmarks, use it for several days. If I saw even one error, minor or otherwise, Gen 3 would be officially off the table.

Now, I’d be willing to bet that what I did next was not entirely necessary. But basically, there are some files you can read back from a system directory in linux which will tell you if you’re having NVME errors. Non-volatile memory advanced error reporting, or NVMAER for short. I go into more detail in the original article.

I run many scripts via cron on this machine. The ease of scripting as a sysadmin’s tool is a large part of what makes *nix such an excellent platform for power users. So… I wrote up a script, which runs once per hour. It checks for any of three types of NVMAER errors; when it does this, it appends a time stamped line to a log file stating wether or not it found errors. If It does find any, it will say which kind of errors they were, and I’ll know WHEN they happened.

Now, I’m sure what I am doing here is entirely redundant. I’d be very surprised if the system logs don’t already store all this and more, but it doesn’t tax this system to run a small script once per hour, and it gave me more confidence that if anything wonky did happen at Gen 3 speed that I wouldn’t possibly miss it! The last thing I wanted was to have minor errors which weren’t obvious, then down the road I end up with corrupt files.

I figured I’d share that script, because it came out pretty clean. And, it is a really good example of how one can go about building the tool, which solves a given problem. The multiple error types which are possibly made it just interesting enough, in my opinion. AND, even if this may be entirely redundant, just the ease of use made it worth it for me. So maybe you’ll find it of use yourself if you’re also self-validating PCIE 3 speeds on your Pi 5 SSD.

#!/bin/bash

LOGFILE="/var/log/cronlog/nvmaer.log"   # Log file. You'll want to change this! The directory must already exist.

# Define color codes
GREEN='\033[0;32m'
YELLOW='\033[1;33m'
NC='\033[0m' # No Color

# Current date
DATE=$(date)
LOG_DATE=$(date +"%m/%d/%Y %H:%M")
echo "CHECK DATE: $DATE"

# Initialize variables
exit_code=0
log_entry=""

# Function to check errors
check_errors() {
    local error_type="$1"
    local file_path="$2"
    
    echo "Checking for $error_type errors..."
    
    # Capture the output of the command
    errors=$(awk '$2 != 0' "$file_path")
    
    # Check if errors is empty
    if [ -z "$errors" ]; then
        # No errors found
        echo -e "${GREEN}PASSED${NC}"
        log_entry+=" $error_type PASSED"
    else
        # Errors detected
        echo -e "${YELLOW}ERRORS DETECTED!${NC}"
        echo "$errors"
        log_entry+=" $error_type ERRORS DETECTED!"
        log_entry+=$'\n'"$errors"
        # Set the exit code to indicate problems
        exit_code=1
    fi
    echo "- - - - - - - - - - - - - - - - - - - -"
}

# Check for FATAL errors
check_errors "FATAL" "/sys/devices/platform/axi/1000110000.pcie/pci0000:00/0000:00:00.0/0000:01:00.0/aer_dev_fatal"

# Check for NONFATAL errors
check_errors "NONFATAL" "/sys/devices/platform/axi/1000110000.pcie/pci0000:00/0000:00:00.0/0000:01:00.0/aer_dev_nonfatal"

# Check for CORRECTABLE errors
check_errors "CORRECTABLE" "/sys/devices/platform/axi/1000110000.pcie/pci0000:00/0000:00:00.0/0000:01:00.0/aer_dev_correctable"

# Log results
if [ $exit_code -eq 0 ]; then
    # No errors detected
    echo -e "CHECK $LOG_DATE -- NO ERRORS, ${GREEN}[CHECK PASSED]${NC}" >> "$LOGFILE"
else
    # Errors detected
    echo "$log_entry" >> "$LOGFILE"
fi

# Exit with the appropriate exit code
exit $exit_code

Original article: https://lostgeek.net/pi5nvme

Trimming the fat from Raspberry Pi OS Lite

Some of you may know that I host this website on a Raspberry Pi 5. I use Raspberry Pi OS Lite, which is a minimal Debian-based operating system that is lean and minimal without excluding anything that would break any features of the Pi itself. I’ve got the 4 GB model, and I don’t think I’ve ever used more than 400-500 MB of RAM during normal server operation. So why slim it down even more? Well, more software equals a larger attack surface, more potential software bugs, and so on.

In a situation where I’m never using the built-in WiFi and Bluetooth radios, there’s no benefit in having their drivers loaded into the kernel. Having unused code running can only increase the likelihood of exploitation, unexpected behavior, bugs, or other unwanted results. These devices also consume power, albeit a small amount, and probably even less when they aren’t connected to a network or device.

Now, I’ve found the drivers on the Raspberry Pi to be pretty good. Honestly, I’ve never had an issue. But since I’m literally not using any wireless on this thing—it’s connected to my network switch with less than a foot of Cat6 Ethernet cable—why bother? If nothing else, you’ll free up a few megabytes of memory. Perhaps an even more tangible benefit is having fewer items cluttering your systemd services and process lists when you check with top or htop.

After removing the following, I saw my memory usage drop to just 125 MB initially. That’s 125 MB of memory used while running Debian 12, with my Apache2 HTTP/HTTPS server and Pi-hole DNS. That’s not bad—kind of impressive, actually!

  • Stopped & Disabled:
    • Audio (via config.txt)
    • avahi-daemon
    • bluetooth
    • ModemManager
    • NetworkManager
    • triggerhappy
    • wpa_supplicant

Most of these are self-explanatory. As for the less obvious names, avahi is sort of like Apple’s Bonjour service; it’s for mDNS/local device discovery. I knew I didn’t need it, but if you’re not sure, leave it alone. Triggerhappy is a hotkey daemon, which is an easy one to disable on my totally headless system. Audio can be disabled by commenting a line in /boot/firmware/config.txt:

dtparam=audio=off`

And since I was in there anyways, I also commented a couple other lines:

camera_auto_detect=1
display_auto_detect=1

ModemManager, Bluetooth, and wpa_supplicant can just be turned off if you don’t plan on using WiFi or Bluetooth.

sudo systemctl stop ModemManager
sudo systemctl disable ModemManager

Repeat the same two commands for the other daemons.

Now, I’m not making this a full tutorial, and there are two reasons for that. For starters, I’m feeling kind of lazy, and I don’t want to have to redo everything to make sure my directions are 100% correct.

If you want to get rid of NetworkManager too, you’ll want to set up networking manually first. In my case, I edited /etc/network/interfaces and added the following:

auto eth0
iface eth0 inet static
address 10.16.17.10/23
gateway 10.16.16.1
dns-search lan
dns-nameservers 10.16.16.1

If you’re not sure, just leave NetworkManager installed. In my case, I went with a static configuration because I didn’t want to have a daemon running for the DHCP client. If your subnet mask is 255.255.255.0, you would use /24.

But the other very real reason is: If you’re not confident yet in how to disable these things, you probably shouldn’t. Do a bit more research first anyways.

When making changes to your system, have an up-to-date backup because you never know when a change could leave you with a non-booting system. Also, when changing the networking system, it should go without saying that doing so can leave you locked out of a headless system. So only proceed if you have a means of getting back in to fix it should you mess up.

This is really more of a journal of my experience setting this up, for those with some experience to get ideas from. It isn’t meant as a tutorial by any means. I just wanted to share how I got my idle RAM usage down to 3%, with my services running.

Operating System Recommendations

OpenBSD: My thoughts on using it
Raspberry Pi 5: My list of 16 different Operating Systems

Note: These two aren’t my top picks, they’re featured up top here because they have their own pages. The rest of the links here will take you right to website of the project being described.

Fedora MATE-Compiz Desktop Spin

The Fedora Project started in 2003 as a continuation of the Red Hat Linux project.  Fedora is the upstream source for Red Hat Enterprise Linux as-well as Cent OS Stream. New versions of Fedora are released every 6 months, each release is supported for at least 13 months.
If you want a fresh experience, with new and fresh packages then Fedora is a great option.  At the moment of writing this I’m running version 40 with the 6.8.9 Linux Kernel.  Updates are quite frequent, and the dnf package management tool is great.  If you prefer a stable, more static system which updates less frequently then I’d recommend Debian instead.

Debian Bookworm

Debian has been around for a while, starting up way back in 1993. It is among the oldest Linux Distributions still in active development, second only to Slackware.  Debian is a community run project, unlike Fedora.  Debian’s repository offers more than 50,000 packages.  It is one of fewer and fewer distributions to still support the 32 bit Intel architecture, meaning it can be installed easily on any  x86 PC made in the last 25+ years. APT, the Advanced Packaging Tool makes searching for and installing software on Debian incredibly easy. Even for users whom are new to Linux.
Releases in the form of a new stable branch are released about every two years, and receive official support for three years. Incremental point releases are made available every few months. Even after EOL (end of life), a release receives an additional two years of security updates.
If you want a rock-solid stable Linux experience, and you’re okay not having the very latest packages then Debian may be perfect for you.  With 5 years in total of security updates per release, you don’t need to worry about major upgrades breaking anything.  Between the long term support period and the vast landscape of available packages, Debian makes an excellent server operating system.  If you want a stable system which “just works”, honestly it is a great choice to run on for workstations as well.

FreeBSD 14.0 RELEASE

Also released in 1993, FreeBSD is a descendant of the Berkeley Software Distribution (BSD).  BSD, originally named Berkeley Unix was based on the source code of the original Bell Labs Unix.  FreeBSD is a complete operating system, comprised of kernel, drivers, user-land, and documentation.  This differs from Linux in that Linux is only a kernel, with drivers. Combined with GNU utilities, you get GNU/Linux — people now just call it “Linux”.
FreeBSD is the most popular open source BSD operating system, and code from FreeBSD can be found in macOS, iOS, TrueNAS and in the operating systems which run on both the PlayStation 4 / 5 and Nintendo Switch.
While some use it on the desktop, myself included, FreeBSD really shines in the server space.  The advanced OpenZFS filesystem and robust TCP/IP stack make an incredibly strong platform for high demand environments.  Check out: Serving Netflix Video at 400Gb/s on FreeBSD

Devuan Daedalus

So, starting with Jessie, Debian switched to the systemd init and service manager.  A lot of people were not happy about it, and as a result Debian was forked.  Devuan is just Debian, but they make offer you a choice of using sysvinit, OpenRC or runit.  Default desktop environment is XFCE instead of GNOME, so that’s a plus in my book as well.  For most people, I’d recommend just using regular Debian.  Devuan is a nice option in certain cases though, and since it is an absolute nightmare trying to change a normal Debian install from systemd to literally anything else, I can totally see why people felt the need to have a fork.

My Operating Systems Journey

Like many among us, I was once a Windows user.  Hell, between you and me?  I may have even liked Windows.  For a while.  I liked Windows 2000 and XP quite a bit, they get out of the users’ way and let them get real work done.  They weren’t bloated, even XP pre SP2 is completely usable on anything better than the slowest Pentium II.  NT 4 was also great, and I used that quite a bit as a kid in school.  XP was king of the hill, for a long time.  Too long.  My first taste of it was in 2002, and coming from Windows 95 I absolutely loved it.  The family PC had an Athlon XP /w 256 MB DDR RAM; that was bought with XP and of course ran it quite well.  My personal laptop at the time was a ThinkPad 390E.  My 390E had been upgraded to 128MB RAM, and rocked a Pentium II @ 333 MHz.  That old ThinkPad actually ran XP extremely well.  Bear in mind, of course, this was a computer which was only a few years older than XP. The 390E came out in 1999.  Tech was evolving MUCH more rapidly during this time though, and moor’s law held truer than ever.

In 2003 I was given a set of Red Hat Linux 9 installation CDs.  Computers were my thing, naturally I had to check it out.  I wasn’t ready to give up my stable XP experience on my laptop as a complete Linux newbie, and instead played around with the OS on various older PCs I had.  I liked it, certain things sort of amazed me.  The sheer volume of software included across those three CDs was mind blowing to me at that time; I’d never seen anything like it.  My experience until that point was: Install windows. It comes with wordpad, calc, solitaire, etc.  So that’s one, whole CD.  Install MS Office; that’s another, whole, CD.  A game?  It’s own CD.  So in a three disc set having literally dozens of applications was kind of amazing.  Full office software suite, web browser, email client, irc client, complete software development environment, media players, games.  What about themes? How about multiple desktop environments. Both KDE and GNOME at this point time, looked & felt TOP notch, in my opinion.  One thing stuck out even more so to me though. Xscreensaver.  It was beautiful.  Hundreds of incredible screensavers, many of which had impressive 3D / OpenGL graphics.  I still remember the moment I realized that the Linux install I had done had SO MANY awesome screensavers.  Mind blown.  Remember, at this time I didn’t have broadband — just dial-up.  Becoming more interested in Linux, I wanted to run Fedora Core.  I still remember going over to my uncle’s house, and thinking it was the coolest thing in the world that he had not only broadband, but 802.11b wifi.  And it was in that way, I obtained Fedora Core 3, 4, 5 and 6, between 2003 and 2006 roughly.  Took several pages in my software binder.  Four CDs per page in the binder, but each release took 4 – 6 discs.

I ran XP into the early days of Windows 8.1.  During the Windows 7 days, XP was still quite well supported or even dominant for the most part.  Windows 7 was good, but I really only used it at work.  8.1 with classic shell was good for me, better than many would probably think.  After the start of what is now known to be the typical M$ experience, I was all set. For those who don’t know, I’m talking about bullshit like: Ads in Start menu, One day you boot up your PC and now all of the sudden it’s running Windows 10 (and did this without asking, or after you said “No”).  Forcing updates which could compromise stability, downloads which waste bandwidth, and a non-optional upgrade to a whole new OS version is completely unacceptable.  It shows that Microsoft has absolutely no respect for their users.  These harmful behaviors were carried out at the cost of many users sanity and productivity more importantly.

If the user can’t be trusted to install their own updates, so they can plan accordingly for bugs / downtime, I’m all set. I’ll use something else gladly.

Prior to all this, I had stopped using Linux in a “here and there” casual capacity when Gnome 3 came out.  It was awful, and ruined Linux for me.  I can still vividly remember tossing together some parts I had into a system to use in my workshop.  I figure, lets give Linux a try, it’ll be perfect for this kind of casual use — web browsing, playing MP3s.  Bog standard Pentium 4 3 GHz, 1 GB RAM… I booted up into Fedora Live (circa 2011).  Literal slideshow.  I was beyond disappointed.

Three years later I started using Lubuntu, and was satisfied enough with it to use it full time for the next six years or so.  This was when Lubuntu used the lightweight X11 desktop environment; LXDE.  Around 2019 they switched to LXQT, which I’m not quite so much a fan of.  I went to Ubuntu Mate and Xubuntu for a while, and then realized that regular Debian was better in every conceivable way.

Today I use Fedora and FreeBSD on the desktop, Debian and FreeBSD on servers.  I still don’t like modern Gnome, though it has gotten immensely better than it was back when it first came out.  I use MATE or LXDE 99% of the time I’m in a GUI.  They’re both lightweight and solid.  MATE has more creature comforts, and offers me a more productive layout.  Out of the box it has a fair bit more included than LXDE.  That said, LXDE is great for low end hardware or laptops with lower screen resolutions.  And, if you like bare bones and building it yourself, LXDE is a great option because it doesn’t come with any fluff you don’t need.  Because most distributions package LXDE with Openbox as the window manager, it is a great way to get Openbox up and running with a regular taskbar / familiar desktop layout.

You can read more about desktop environments and window managers over on the Packages page. See some of my favorite BSD/Linux/Mac wallpapers.

Recommended Free Software

These days I’m a Linux & FreeBSD user, most if not all of this software is available on both platforms.  It is all free and open source software, with either GPL, MIT or BSD licensing.

Desktop Environments

MATE Desktop:  a continuation of GNOME 2
The MATE Desktop Environment provides an intuitive and attractive desktop environment using traditional metaphors for Linux and other Unix-like operating systems. MATE is under active development to add support for new technologies while preserving a traditional desktop experience. Personally, I use MATE on pretty much every machine I actually use. It is my go to. Window-snapping / tiling has been added, and it is great to be able to use keyboard bindings to half or quarter tile your windows instantly. XFCE can do the same things, and is a fine choice too, I’ve just been using Gnome/MATE for a long time and find it a tad cleaner out of the box. If Gnome 3/40+ makes you dizzy and KDE 5/6 has too many options and feels bloated; Welcome to MATE!

Website: mate-desktop.org | Install Guide: Wiki page | FreeBSD Handbook: Installing MATE
LXDE: the light-weight X11 Desktop Environment
LXDE is a complete (but small) desktop environment with comparatively low resource requirements. It will feel speedy on your Core 2 Duo, yes even in 2024. Written in C, and uses the GTK 2 toolkit. Default window manager is Openbox, and LXDE is a great way to get into using openbox without writing your own configs for it. You get a desktop /w icons, familiar right-click menu, and panel with task-bar and system tray. Available on most Unix-like systems.
Website: lxde.org | FreeBSD Wiki: Installing and Configuring LXDE

Software

Krita – My free “Photoshop” go to. I must admit, I’ve only recently found this gem of a program and boy do I wish I’d found it sooner. I got pretty comfortable in PS back in the CS 3 – CS 4 days, and Gimp (in my opinion!) is simply not intuitive. Krita is incredible. I’ve only as of writing this used it a dozen or so times for small things and I’m already thoroughly impressed. It is a solid offering, and for me I find it vastly more usable than gimp. Better yet even it is available from FreeBSD ports / packags! Krita.org

PaleMoon – A browser completely built from its own, independently developed source which forked from FireFox of days past. I really love this browser, especially the interface. I use it whenever possible. uBlock origin works via the current “firefox legacy” plugin. Plus, FreeBSD, Linux and other pre-compiled builds are available right from their website!

Firefox – These days there are probably better options.  I don’t agree with a lot of things Google does, so I haven’t touched chrome in years.  Firefox has been pretty good to me over the past two decades. I even use it on my phone. Mozilla.org

guvcview – Web cam and video capture software. Build configurations for GTK, QT and console only. Works with V4L devices; cameras, capture cards, etc. Of what I’ve tried, this has worked well for capturing video and viewing video from various sources on screen. guvcview.sourceforge.net

SeaMonkey – This is the modern era Mozilla application suite.  Browser, E-mail, irc and WYSIWYG style HTML composer all in one. HTML editors are few and far between these days, so SeaMonkey is probably what you’re looking for. It also offers a lighter browser compared to FireFox. As a browser, I have found that most things will work, with a couple exceptions.

    This page will tell you everything you need to install Seamonkey on Debian / Ubuntu.

Here is v 2.53 someone compiled on FreeBSD 13. I’ve tested it myself, and it works fine on FreeBSD 14 aswell. **This is a couple years old now and may not be secure! Use at your own risk. **

InputLeap – Formerly named “Barrier”, this program allows you to share your a single mouse and keyboard across multiple desktops.  This can be very handy if you have multiple systems on the same desk, or maybe to plop your notebook down beside your workstation for more screen space to multi-task.  I’ve used it between FreeBSD on my laptop and Fedora on my desktop, and it works perfectly. GitHub

Solaar – Software to get otherwise unavailable functionality out of Logitech wireless peripherals working on Linux.  It lets me use my function keys as… function keys.  Instead of useless multimedia functions, I can use F1 – F12.  For me, a must have; although I wouldn’t need it if they didn’t design their keyboards with that flawed design decision. GitHub

virt-manager – Virtual Machine Manager, a GUI front end for Linux KVM, Xen, LXC, FreeBSD Bhyve and more. virt-manager.org

xscreensaver – The standard screen saver collection included on most Linux and Unix systems running the X11 Window System.  First released in 1992, it now has hundreds of absolutely great screensavers, many of which use OpenGL and impressive 3D graphics.  It is also the only way to securely lock your screen on X11, unlike forks which have made changes to compromise security and stability. jwz.org/xscreensaver

Must haves for any system:  (console / tty)

Bash – Borne Again Shell, a full featured system shell.
GNU Bash Homepage
Htop – A better version of top, with nice visuals and lots of useful features.
        htop.dev
Nano
– Very easy to use editor.  There’s nothing wrong with vi / vim, but I still use nano all the time.
nano-editor.org
Sudo – Lets the user run a command as superuser (root).
sudo.ws
OpenSSH – Secure shell tooling for remote access, developed by the OpenBSD project.
openssh.com

PCI Express Solid State on the Pi 5 for under $25

Since February I’ve been running this website, among other things from a Raspberry Pi 5. The SD card did okay, I actually can’t complain too much and if I’m being honest here I have to say SD card storage has gotten a lot less flaky since the earlier days of the Raspberry Pi.  None the less, this is my server and I want it to be decently equipped. I think the Pi 5 is mildly over priced (depending on why you need one), and getting a Pi, high performance SD card, the active cooler, official power supply, a case… you’re into some money. Not to mention the stupid mini-hdmi to normal hdmi adapter.

If you’ve already got a Pi 5 though, or know you’ll be satisfied with one then here is how I added a 128 GB SK Hynix NVMe SSD for under $25. SSD & hat included.
Geekworm BoxSK Hynix
          BC711
Amazon has various PCI-e hats for the Pi 5. Prices are between $7 and $50. But from what I’ve seen, unless you’re getting a multi-device hat I would cap my budget under $30 or so, and I’ll tell you why that might be worth considering. Spoiler, I didn’t consider it. The priciest of hats allow the use of multiple M.2 devices, but you’re sharing that bandwidth so in most cases I don’t think it makes much sense. But, bear in mind other hardware than PCI storage exists like Ai accelerators, network adapters, anything you can think of pretty much.

In some of Jeff Gearling’s content covering these pcie hats, he mentions that not all of them come with an impedance matched ribbon cable. What  does that mean? Well, PCI express is a pretty high tech thing, and you can’t just pump data over a pair of rusty coat hangers. On PCBs you may have noticed sometimes there are traces which curl or squiggle in odd, seemingly pointless ways.

Well, not so pointless as a matter of fact, it all comes down to impedance, shielding from interference and other matters which effect signal integrity. If you plan on using a high end SSD then you may want to go with this special cable. There are two ways to do that: Buy the cable on its own. (They’re dirt cheap) Or if you don’t feel like sourcing one then you can find a hat which includes one. The cheap-o cables are usually white plastic ribbons, commonly with blue plastic at each end to keep the row of pads rigid for inserting in the female connector. The nicer, to-spec cable will be an amber, pcb looking color, or may be black. But if in doubt, do some research.

SSD
          in hat            So This was annoying though. This hat is sold as being 2230 / 2242 compatible… and it is. But they don’t give you the nut and screw for 2230 drives, the shorter position.

Luckily I had such hardware unused from another adapter card, an mSATA to SATA Hardware board.

So the Pi 5 is certified for PCI E gen 2. Running it faster seems at first glance to be asking for trouble. People have had good luck with it though, and it is easily enable with a single line in the Pi’s config.txt.

Well I tried it, cheap cable and all. The improvement isn’t insignificant, in fact on my Gen 3 SSD I saw substantial benefits from the increased bandwidth.

Lets see the numbers…

Graph:
          Performance Compared

As we can see, you’re not going to be getting the same performance on your Pi as you would in a regular PC — forced gen 3, or otherwise. This is because the Pi only has a single PCIe lane going to the expansion header. That’s okay though, and as you can see it still beats the pants off an SD card, or even most SATA drives. The SSD arrived a few days before the hat, so I put it in my desktop to ensure it was working and see what the SMART data said. The drive only had ever had 300 GB or thereabouts written to it and just 6 power on hours. Not bad for $16 bucks!

Now, to Gen 3 or not to Gen 3, that is the question…

This is my server after all. I take pride in having little to no down time, hence springing for the SSD in the first place. Reliability was more of a motivator for me than throughput, but both are attractive of course. Doing some testing and benchmarks with the Gen 3 config line in place, I have not yet noticed a single error. You can check for them by grepping “nvme” in dmesg, or by reading from /sys/devices/platform/axi/1000110000.pcie/pci0000:00/0000:00:00.0/0000:01:00.0/aer* and in my case nothing looked to be amiss.

So, the real comparison then given our choice of Gen 2 or 3. It isn’t as small of a gain as the first chart may have you be thinking it is.

Graph:
          Gen 2 vs Gen 3

    Yeah, that’s what I said. Damn, almost double. So I’m leaving it in Gen 3 mode and I’ll keep an eye on things. To do this upgrade I had fully mirrored this server anyways to my FreeBSD franken-server so that can be quickly set back in place if I need to tweak anything. Up till now, all down time has been planned… in other words, there hasn’t been any.   : )

© 2025 LostGeek.NET - All Rights Reserved. Powered by ClassicPress, NGINX, Debian GNU/Linux.