Debian Trixie: Goodbye Init Freedom

With Trixie, comes changes…

systemd logo

As someone who has been running Debian servers for about a decade, one thing I’ve always appreciated is that if you didn’t like a core component, you could swap it out. That used to include the init system. Whether you preferred sysvinit, OpenRC, or runit, Debian gave you the tools to do it.

With Debian 13 Trixie, that is basically over.

What Changed

To be clear, Debian as defaulted to systemd since Jessie; we’re not talking about that. We’re talking about the OPTION to use another system instead. On Bookworm and earlier, moving away from systemd was simple:

apt install sysvinit-core
reboot

You might clean up a few services or install orphan-sysvinit-scripts, but it worked.

In Trixie, too many core packages now assume systemd is there. Udev is the most obvious example. During upgrades, it will pull in systemd even if you’re trying to stay init-free. Other essential packages have dropped their init scripts or unit files for anything else. If you boot without systemd, critical services will fail. The choice exists in theory, but it’s fragile and unsupported in practice.

Why It Is Happening Now??

This isn’t random. Version 13 tightens dependency chains across the core system. Packages such as udev, dbus, logind, and many desktop or network management components are systemd-aware by default. In previous releases, these dependencies were optional or provided fallbacks. In Trixie, the fallback paths are gone or broken. Swapping init now can silently break critical parts of the system.

For Some, Devuan May Finally Make a Lot of Sense

I never really understood why Devuan existed. On Jessie, Buster, Bullseye, and Bookworm, one could do a base install, install their init of choice, reboot, and purge systemd. Devuan always seemed like a convenience for users who wanted to skip that step.

Now, changing init is a literal nightmare. The system doesn’t allow it. You’re forced to boot from another system and attempt the change via chroot. Even then, it’s messy. For those who want a system without systemd, Devuan now has a legitimate place, even for technically inclined users.

Why might one avoid systemd:

  1. Simplicity and predictability: Traditional init systems are easy to debug, less opaque, and don’t pull in a large web of dependencies.

  2. Resource footprint: Sysvinit or OpenRC can run with minimal memory and CPU usage, ideal for very small servers or embedded systems.

  3. Control: Fewer hidden processes and services mean you can strip down and tune exactly what runs at boot.

Reasons to stick with systemd:

  1. Ubiquity: Most packages, especially in Trixie, assume systemd is present. Running without it often leads to breakage or fragile setups.

  2. Service management features: systemd provides dependency-based service startup, logging, timers, and cgroup integration out of the box.

  3. Easier integration with modern software: Many newer server tools and desktop components expect systemd and may not work properly without it.

Systemd Makes Sense for Most Users

For the majority of us, systemd offers clear advantages and a cohesive, performant set of system daemons that do their job reliably. It’s unfortunate, however, that the long tradition of Debian giving users choice in init has essentially come to an end.

For those disappointed by this, Alpine is worth a look. Alpine is a super minimal distribution based on BusyBox. It uses the musl C library and remains impressively small while still offering a well-curated and thorough selection of packages. And of course, Devuan. Devuan is a Debian fork whose claim to fame is being systemd-free. Any packages that would normally depend on systemd have been adjusted or patched for a smooth experience, including things like elogind replacements and tweaks to GNOME dependencies.

Final Thoughts

Debian used to be a super-flexible system that could be stripped down and tuned to run in very small memory footprints. It mostly still is, but with Trixie, it’s just a bit less flexible, and that’s truly too bad. They broke a decades-long tradition.

For those who are really bothered by this, thankfully there is Alpine and Devuan.

Whether you preferred sysvinit, OpenRC, or runit, Debian gave you the tools to do it.

With Debian 13 Trixie, that is basically over.

Debian 13 “Trixie” Officially Released

TuxTrixie Released Today!

Debian 13 “Trixie” is here as of today, August 9, 2025. It’s been a little over two years since Debian 12 “Bookworm” came out on June 10, 2023, and this is one of the most significant stable upgrades in recent memory.

Trixie’s release process followed the usual Debian rhythm. Toolchain freeze hit March 15, soft freeze April 15, hard freeze May 15, full freeze July 27, and now we’re finally at the stable release.


Kernel and Core Changes

Trixie ships with the Linux 6.12 LTS kernel. That brings better hardware support, improved performance, and security hardening. There’s official riscv64 support now, but mipsel is gone. Installer images for i386 and armel have also been dropped. Security hardening has improved on amd64 and arm64, with protection against ROP and COP/JOP attacks. HTTP Boot is now supported out of the box.


KDE Plasma 6 Arrives

When Bookworm launched in 2023 it stuck with Plasma 5.27 LTS because Plasma 6 came out in February 2024 — months after Debian’s freeze. Trixie is the first Debian stable to ship Plasma 6, and for desktop users this could be the single biggest reason to upgrade.

Plasma 6 moves to Qt 6, which improves performance and lowers memory usage. Wayland is now the default with better touch, pen, and gesture support. Fractional scaling works per display, multi-monitor setups are smoother, and there’s early HDR groundwork. Breeze has been refreshed, animations are smoother, and many KDE apps like Dolphin have had major improvements.


GNOME 48

GNOME 48 in Trixie brings a cleaner look, better performance, and refinements across the board. Nautilus has improved search and preview handling. The Settings app has been reorganized for easier navigation. Workspace gestures are more fluid, and core apps integrate better with dark and light modes.


Wayland by Default

Wayland is now the default session for both KDE and GNOME on most hardware. It offers fractional scaling per display, smoother rendering, and improved input handling. PipeWire integration boosts screen recording and streaming performance. NVIDIA proprietary driver support has improved to the point where more users can make Wayland their daily driver. X11 remains available if needed.


Toolchain Updates

GCC is now at 14.2, Python is 3.13, and there are countless package updates. Debian continues its push toward reproducible builds, adds HTTP/3 support in curl, and improves Qt WebEngine with spell-check.


Getting Debian 13

At the time of writing, the main Debian.org “Releases” page hasn’t yet been updated to list Trixie front and center, but the release notes and installers are live. You can grab them directly:


OpenWRT on a Thrift Store Router (Netgear WNDR3700 v4)

WNDR3700 v4
NETGEAR WNDR3700 v4 WiFi Router

Earlier today I stopped by a local Goodwill to see what they had in the way of electronics. Among the digital photo frames and old keyboards, I spotted two routers. I’m always on the lookout for hardware that can run Linux. One of the routers was a Netgear WNDR3700 v4. It was in its original box with the power adapter and a couple of patch cords.

Normally I’d pull out my phone and check OpenWrt support before buying, but this one looked old enough that I figured there was at least a 50/50 chance it would be an easy convert. I’m glad I grabbed it; Not only is this model supported, but flashing OpenWrt is about as painless as it gets.


Flashing with OpenWrt — No UART, no TFTP, no drama.

  1. Factory reset the router.
  2. Connect to it at http://192.168.1.1/ in your web browser. Log in with:
    Username: admin
    Password: password
  3. Go to Advanced.
  4. Download the latest OpenWrt “factory” image for WNDR3700 v4 from the OpenWrt site. *Note, maybe do this first!*
  5. Upload it via the Netgear’s firmware page, under “Advanced” in the web ui.
  6. Wait a few minutes for the flash to complete.
  7. Reconnect your computer (get a fresh DHCP lease), then visit 192.168.1.1 again.
  8. Log in with:
    Username: root
    Password: (blank)*Note, maybe do this first!*
  9. Set your own password… and you’re done!

This 2012-era router is now running a fully up-to-date Linux distribution.


In My Case…
I reconfigured mine to serve as a simple gigabit switch:

  • Disabled both Wi-Fi radios.
  • Configured the “WAN” port into another LAN / switch port.
  • Disabled the DHCP server.
  • Set the LAN bridge (br-lan) to DHCP client so it picks up an IP from my main network.
  • Gave the new router’s MAC a dhcp reservation on my main router, and added the new hostname to my hosts file.
    That way I can still log in for maintenance while it’s acting as an extra switch.

WNDR3700 v4 Hardware

CPU / SoC: Atheros AR9344 @ 560 MHz
RAM / Flash: 128 MB RAM / ~128 MB flash
Wireless: Dual-band 2.4 GHz + 5 GHz, 802.11n (N600)
Ethernet: 1× Gigabit WAN, 4× Gigabit LAN
USB: 1× USB 2.0 “ReadySHARE” port


What Can You Do With It?
Plenty. This hardware can easily run the latest OpenWrt without feeling sluggish. The USB port opens up even more possibilities:

  • Failover WWAN modem or phone tethering
  • Network printer sharing
  • USB hard drive for network storage
  • DIY internet radio streamer with a USB sound card

With OpenWrt, you’re only limited by your time and imagination.


Why Bother?
Netgear’s last firmware for this model came out in 2018. That’s seven years without security updates. OpenWrt gives you:

  • Modern kernel & drivers
  • Current security patches
  • A huge ecosystem of packages

All on hardware that cost me four bucks at a thrift store.


OpenWrt Support History for the WNDR3700

  • Original WNDR3700 (v1) launched in mid–late 2009 with Atheros hardware.
  • OpenWrt support for the series appeared within months of launch, making it a long-time favorite in the community.
  • The v4 hardware revision hit the market around June 2012.
  • Because v4 kept an Atheros chipset (AR9344) with generous RAM and flash, it was officially supported soon after release.
  • The best part: Netgear’s stock firmware for v4 accepts an OpenWrt “factory” image through the web interface. No serial cable required, no bootloader tricks, just upload and reboot.

This combination of long-term support, open-friendly hardware, and GUI-based flashing makes the WNDR3700 v4 one of the easiest budget OpenWrt targets you can find.

NETGEAR WNDR3700 on OpenWRT Wiki / TOH
OpenWRT Version 24.10 Factory Image for WNDR3700 V4 – Direct Link

Building an Optimized Linux Kernel on Fedora 42

fastfetch screenshot
Fastfetch shows my custom 6.15.9 Kernel

Preparation: You’ll need to install some tools and dependencies required by the build process. On Fedora you’ll want to run the following:

sudo dnf install gcc make ncurses-devel bc openssl-devel elfutils-libelf-devel rpmdevtools fedpkg rpm-build
sudo dnf builddep kernel

Getting the Kernel source tarball
Head over to https://kernel.org and download your branch of choice. I’d recommend the latest Stable tarball.

wget https://cdn.kernel.org/pub/linux/kernel/v6.x/linux-6.15.9.tar.xz

tar -xf linux-6.15.9.tar.xz

cd linux-6.15.9

Copy your current defconfig

We’ll copy the running kernel’s configuration into our source tree…

cp /boot/config-$(uname -r) .config
make oldconfig

You should see some output, ending with “configuration written to .config”.

The easiest way to set our flags is to simply export them in our current shell before proceeding to run make. I did the following for my AMD Ryzen 5800XT:

export KCFLAGS=’-march=znver3 -O3′
export KCPPFLAGS=’-march=znver3 -O3′

You can do march=native if you’re not sure exactly what to use for your specific CPU. Only do znver3 if you’ve got a Zen 3 chip!

Then build.*

make -j$(nproc)

* If you’d like, make additional makefile edits before running make. Or, make menuconfig if you’d like to browse through available options. But, be careful… It gets pretty technical! Simply by following the instructions above you’ll end up with a Kernel which is newer than what you’ve got, better optimized, and smaller. Basically, better in all ways. All without having to make any questionable changes on your own… But of course, feel free to explore the available options! Keep in mind, always keep a known-good stable kernel in your grub configuration in case you make a mistake!

Your kernel will take some time to compile. Anywhere from several minutes to a couple of hours, depending on how powerful your processor is and how many modules must be built. Higher optimization levels typically will take more time as well; the standard level is O2, we’re doing O3. Performance is generally better but the initial build will take a bit longer.

When the compilation is finished:

sudo make modules_install
sudo make install

This will install the kernel modules to /lib/modules/6.15.9/ (in this case). These are drivers and kernel features compiled as =m; they’re loadable instead of built directly into the kernel. Make install will install the compiled image to /boot. In this case /boot/vmlinuz-6.15.9.

We can verify our new image is Grub’s default by running:

sudo grubby –default-kernel

We should see /boot/vmlinuz-6.15.9”.

Reboot into your new optimized kernel!

Upgrading the home network…

At a crossroads here…

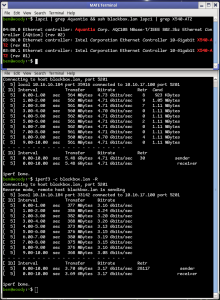
Perhaps you saw the last post about upgrading the WiFi card on my desktop’s new motherboard? Well, about a week or two later, I finally ran and fished Cat6 from the server/router to my desk. So now I’ve got solid 1000 MB Ethernet… for now. I think 10 GB would be great, and eBay has plenty of cheap high-end cards from the likes of Intel, Chelsio, and Mellanox (NVIDIA). They’re cheap too — $12 to $20 per card kind of cheap. With a pair of cards, I can do 10 gigabit between my desktop and my server.

The thing is, I’ve only got 100/1000 MB switches. That’s okay though. I’m thinking I might take motivation from an old Level1Techs video, The Forbidden Router. ( Link )

If I put a dual 10 GB NIC in the server, I’ll have the Intel GB Ethernet for a WAN interface and then two 10G ports for LAN (the machine itself bridged to that “LAN” interface). That can then feed into my normal switch and WiFi AP.

Two things though:

The Lenovo Tiny PC I’m using has no PCI-E slot. It also only has one SATA port. I want to add an internal 8TB WD hard disk and a couple of 1–2 TB SSDs for network storage. And with 10 gig, why not?! This keeps the extra mess out of my new desktop build. So I’m thinking “NAS/router combo.” I already run virtual machines to keep things separated, and this would just add more benefits by having one well-configured box.

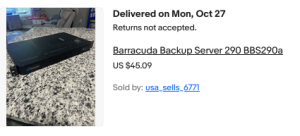
It’d have to be a different box though. I’ve been playing with some used hardware I picked up, which I think will work out nicely for the job of an all-in-one server/router solution (see below). I’m trying out FreeBSD’s bhyve for the first time, and ZFS as well! So far, so good. Will I end up using FreeBSD though? Probably not, but I’m on the fence.

Trying it out has made me realize how comfortable and productive I actually am on Linux… I think it may be wiser to stick with that for the serious stuff I depend on.

The hostname? Well, it needed a quick and dirty case… and I have no ITX cases 🙂

B550M AORUS ELITE AX — Replacing the lousy WiFi!

Finally decided to retire the Haswell system I’ve been using, and ordered up some AM4 goodies during the recent Prime Day sale. I grabbed an AMD Ryzen 7 5800X (8-core, 16-thread), 32 GB of DDR4-3600, and the Gigabyte AORUS Elite AX (Rev 1.3) motherboard. The CPU was the main draw — it was only $130! The board was on sale for $90 (currently $149.99 on Amazon).

Aorus Elite AX Rev 1.3

Thus far I am happy with this motherboard. It doesn’t give me the same vibe of Gigabyte superior value which I got back in the day from the likes of the classics — GA-EP45-UD3P comes to mind! — but, for under $100 it seems quite adequate.

The included WiFi leaves much to be desired though… Maybe it works fine on Windows?? On Linux, I was only seeing 2 bars and maybe 300 – 400 Mbps.

The solution? Grab yourself an AX210.
Intel wireless cards have excellent support on Linux and BSD alike. For just $20–$30 online, you can replace the built-in Realtek card. It takes about half a dozen screws to open the board and swap the M.2 module. I highly recommend tweezers for disconnecting and reattaching the tiny U.FL antenna connectors.

Where’s the Wi-Fi module located?

Motherboard WiFi
Board with VRM heatsink and shroud removed
WiFi Cards
Realtek NIC beside the new Intel AX 210

My pings are now way, better. Night and day. And the speed is a solid 100 Mbps better, or more. See for yourself!

AX 210 Results
AX210 Results: iPerf3 Test and 100 pings to my server

XScreenSaver MATE Script for Fedora

Fedora

Added a script which does all the same things as the Debian MATE XSS script did…

Installs the Full XScreenSaver collection (GL + Extras)
Removes MATE Screensaver
Symlinks XSS commands to replace MATE SS commands
Optional SETUID for Sonar
Ensures MATE SS doesn’t try to reinstall
Locking works via “System” –> “Lock Screen”
Fix for locking via keyboard shortcut

https://ben.lostgeek.net/code/xsmate/

Utilizing Apt-Cacher-NG’s cache on the server hosting it

apt-get

I’ve been using apt-cacher-ng for a few months now. For those who don’t know, this is a service you can run locally which will proxy apt requests from your network clients. This way, each time a package or update is requested there will be a copy retained in the cache. Upon each subsequent request for the same file(s), the local copy can be served instead. This saves bandwidth, and offers a speed advantage since you’ll likely be getting full GB ethernet line speed on your LAN. Read more about ACNG here.

While several local machines and VMs have no issues using my local ACNG proxy, the server actually hosting ACNG itself seemed to be giving errors when doing an apt update.

You’ll likely see the warnings “503 Server reports unexpected range” as well as “Some index files failed to download. They have been ignored, or old ones used instead.

Basically, because the machine is trying to proxy through itself, some kind of problem occurs. Now, the simple solution is to just point to the normal Debian mirrors directly. That however wouldn’t offer the benefit of our local cache! The more boxes / VMs pulling for it, the more value you’re getting out of the whole setup… So here’s how we resolve this issue.

Write a text file to /etc/apt/apt.conf.d/00acng and place the following lines inside:

Acquire::http::Proxy::localhost “DIRECT”;
Acquire::http::Proxy::127.0.0.1 “DIRECT”;
Acquire::http::Proxy::novo.lan “DIRECT”;

Of course, change “novo.lan” to the hostname of your ACNG host. My sources.list looks like this, hence the hostname used in my example.

deb http://novo.lan:3142/deb.debian.org/debian/ bookworm main non-free-firmware
deb-src http://novo.lan:3142/deb.debian.org/debian/ bookworm main non-free-firmware

deb http://novo.lan:3142/security.debian.org/debian-security bookworm-security main non-free-firmware
deb-src http://novo.lan:3142/security.debian.org/debian-security bookworm-security main non-free-firmware

deb http://novo.lan:3142/deb.debian.org/debian/ bookworm-updates main non-free-firmware
deb-src http://novo.lan:3142/deb.debian.org/debian/ bookworm-updates main non-free-firmware

You may want to add a 4th line, with your actual LAN IP if you’re naming the apt mirror by IP instead.


OpenWRT on the Dynalink DL-WRX36 WiFi 6 Router

Dynalink RouterRouter Box

The Dynalink DL-WRX36 Wireless Router

I purchased my unit from Amazon about 18 months ago. I never even tried the stock firmware — I bought this router specifically because of its solid OpenWRT support and excellent bang-for-the-buck features.

For around $80 (if I recall correctly) you get:

  • Qualcomm 2.2 GHz Quad-Core CPU (ARM64 / ARMv8)
  • 1 GB RAM, 256 MB Flash (for firmware/storage)
  • 2.5 Gbps WAN port, 4× 1 Gbps LAN switch ports
  • WiFi 2.4 / 5 GHz dual-band (4× internal antennas)
  • USB 3.0 port (for a USB HDD/SSD, FTP/Samba share, or cellular modem, etc.)

Rear ports

It’s a shame — I always intended to do a proper, in-depth review of this unit, along with a full guide on flashing OpenWRT. That said, the flashing process was painless and straightforward. If you’ve ever loaded DD-WRT onto an old Linksys back in the day, this is quite similar, though with a few extra steps.

I do recall some slightly ‘gray’ areas in the instructions on the OpenWRT Table of Hardware (TOH) page for the DL-WRX36, and I had made some notes. If I can dig them up, I’ll definitely update this post to include them. As I remember, nothing critical — just a couple of steps that were worded a little ambiguously. I highly recommend reading through the guide fully before starting, so you’re not left halfway through wondering what to do next.

Is it still available?
Amazon doesn’t have it in stock at the moment. Would I recommend it if it was? Absolutely. I’m very happy with mine.

Things to Note:

  • Unofficial builds exist that take advantage of hardware features on this router’s SoC. (The standard OpenWRT images don’t enable these by default — and for now, I’m sticking with the official builds. But performance is still excellent for my needs.)

For those curious, the IPQ807x SoC inside this router supports advanced hardware features like Qualcomm’s NSS (Network Subsystem) hardware acceleration, which dramatically improves routing throughput and reduces CPU load for tasks like NAT, firewalling, and VPN handling. While official OpenWRT builds don’t currently enable these proprietary modules, a few skilled community developers have published unofficial builds that do.

Personally, I run the latest stable firmware from the official OpenWRT release repository, and it’s been absolutely flawless for me. I get my full broadband speeds with headroom to spare — whether wired or over 5 GHz WiFi — and I’ve never felt limited by not having those additional offload features. This setup also ensures I have seamless access to the official OpenWRT package repository via Luci and UCI, with a stable, predictable system that updates cleanly.

That said, for the adventurous or performance-hungry tinkerers out there, those community builds with hardware offloading might be worth exploring. More details and links are listed below if you’d like to check them out.

Additionally — OpenWRT natively supports VLANs and VLAN tagging, letting you create isolated network segments, guest networks, or prioritize traffic on your LAN however you like. Combined with its firewall and routing flexibility, this makes OpenWRT an extremely versatile platform for both home and small business networks.

Performance

Since upgrading my desktop to an Intel AX210 WiFi card, I consistently get 1–3 ms pings to wired LAN machines — pretty respectable. Speeds are solid too, with ~500 Mbps transmit/receive over 5 GHz WiFi.

My configuration is simple:

  • One network for 2.4 GHz and another for 5 GHz, each with its own SSID.
  • I’ve heard of issues running both bands under a single SSID, so I avoided that.
  • IoT devices, mobile phones, TV boxes, etc. are on 2.4 GHz for better range and to keep them off the 5 GHz radio.
  • Desktops and laptops connect to 5 GHz for speed.

It works beautifully. No worries about being stuck on ancient 3.x kernels — OpenWRT keeps this thing current and reliable.

Why is OpenWRT the Cat’s Meow?

Luci, the web-based interface, is clean, solid, and well-organized. Every function accessible through the web GUI can also be executed via SSH on the command line.

If you’re a geek, you already get why this is awesome. But for everyone else: it makes quick changes a breeze — no digging through endless menus. You can configure it like a Cisco router via serial, telnet, SSH, or otherwise.

Other Perks

Packages. Tons of networking, telephony, and FOSS/Linux software packages are at your fingertips — one search away.

At the end of the day, every router is a computer of some sort. Unless it runs something exotic like VxWorks, chances are it’s powered by a Linux kernel. OpenWRT puts you in control. It’s your hardware — and you should run it your way. Suddenly that consumer-grade router feels like enterprise-grade gear.

Useful Links

Happy hacking!

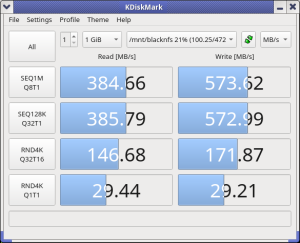
CrystalDiskMark for Linux?? KDiskMark is here to satisfy!

Here is a bit of KDE software which I was not aware of. It was not included in Debian 11 (Bullseye) — you had to build it from source or use third-party packages… However it was officially packaged starting with Debian 12 (Bookworm) and newer.

Here it is, running it on Kubuntu 25.04:

KDiskMark 3.1.3 on Kubuntu 25.04

Excellent little tool for those who don’t want to benchmark disks in the terminal via dd / fio. Nothing wrong with healthy feature parity & easy of use!

© 2025 LostGeek.NET - All Rights Reserved. Powered by ClassicPress, NGINX, Debian GNU/Linux.