I recently picked up a used Thinkpad T420. While I could boot it up, use it, install another OS and all that there were some settings locked out.
There is apparently an option for a regular CMOS password, and a “supervisor” password. Hitting enter got me in with limited access, but I couldn’t do things like turning hardware virtualization on or off… among other things.
If you’re like me, maybe you’re thinking: Hey, just unplug the coincell for a few minutes!
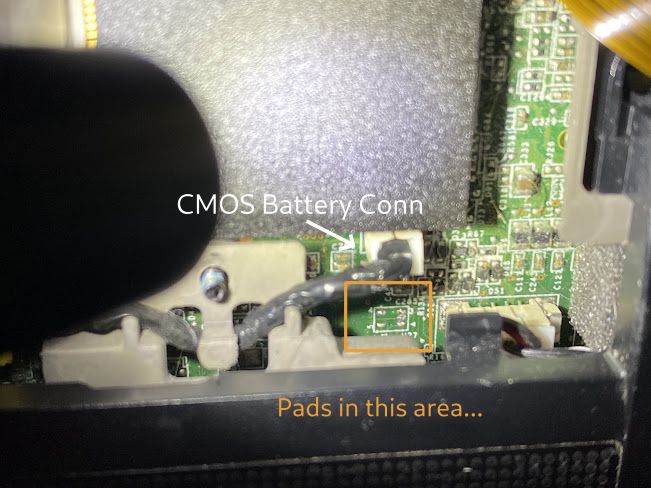
Well that doesn’t work. Fortunately though, there is an easy enough hack. Remove the screw for the RAM door on the bottom of the machine, then use a credit card or blade to nudge the keyboard up from the palm rest. Carefully keep the keyboard connected, but place it sideways out of the way. We need to short a couple pins below where the CMOS coin cell battery connection is on the main board.

Now, lets zoom-in on the actual area where we need to short two points… Tweezers will work well for this purpose.
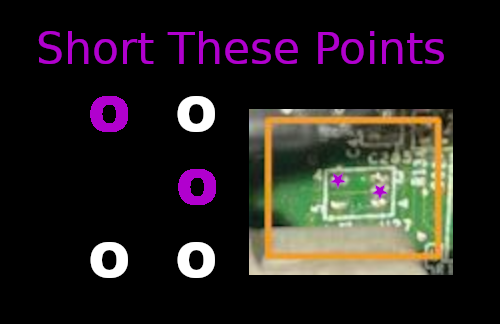
 Now, inside that area where we have the orange box… We need to short the upper left corner to the middle right (center row) pad. This should make things totally clear:
So, this is what to do… Keep either the AC supply, or battery attached to the machine and boot it up.
When you boot it up, hit the blue ThinkVantage button and QUICKLY use your tweezers to short those two points together for a second. If successful, you’ll see the following message.
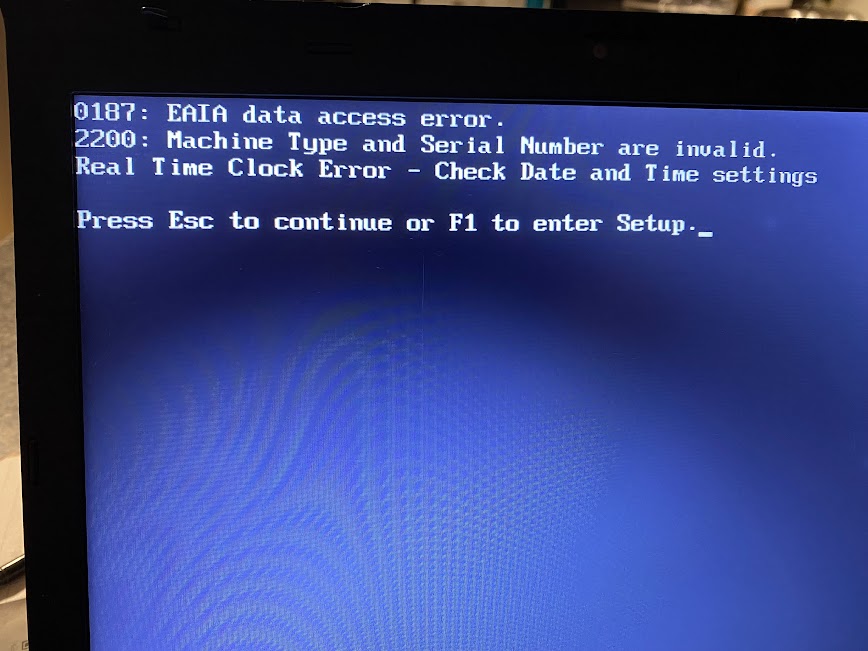 “Data access error” sounds bad, right? Well in this case, such an error indicates success. Yeah, and you don’t stop ‘Cause it’s 1-8-7 on a undercover tsop! Well, SPI, but that wouldn’t rhyme…
Once you get into the BIOS (press F1), be sure to disable all passwords or set them to blank and then save.
That’s it! Worked perfectly on my Thinkpad T420. I found this method via a YouTube video, his pictures were not so clear though. Hopefully this will help my fellow Thinkpad enthusiasts!